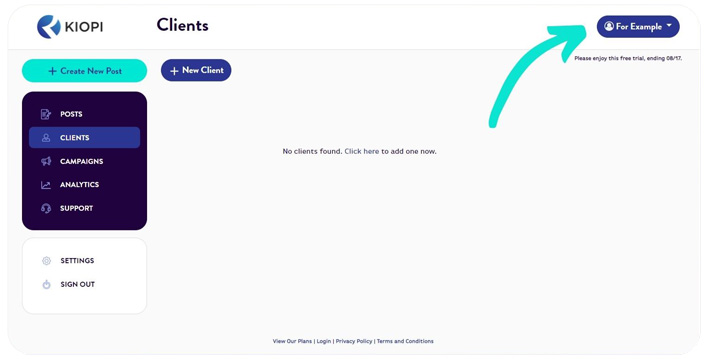
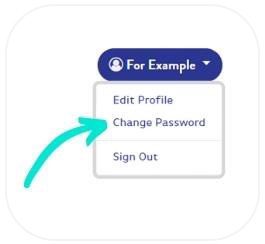
With Kiopi, changing your password couldn’t be easier. From the Kiopi dashboard, simply click on your name located in the upper-righthand corner. For the purpose of this tutorial, we’ll use the name “For Example.”
Once you hover your cursor over the tab, a drop-down menu will appear. Click the second option, Change Password. This will then redirect you to a page where you can change and update your password.
What do I do if I’ve lost my password?
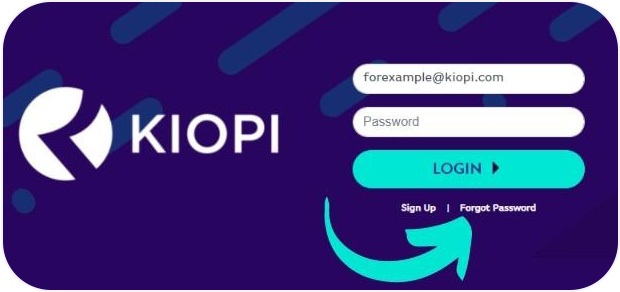
Lost or forgot your password? No worries! On the login page, you’ll notice a button below the LOGIN button that says Forgot Password. Once you click this, you’ll be asked to enter your email address. From there, we’ll send you an email with instructions for resetting your password. It’s as simple as that!
How do I add a client to my account?
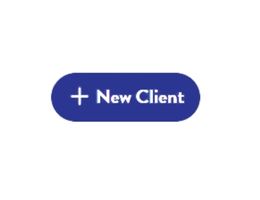
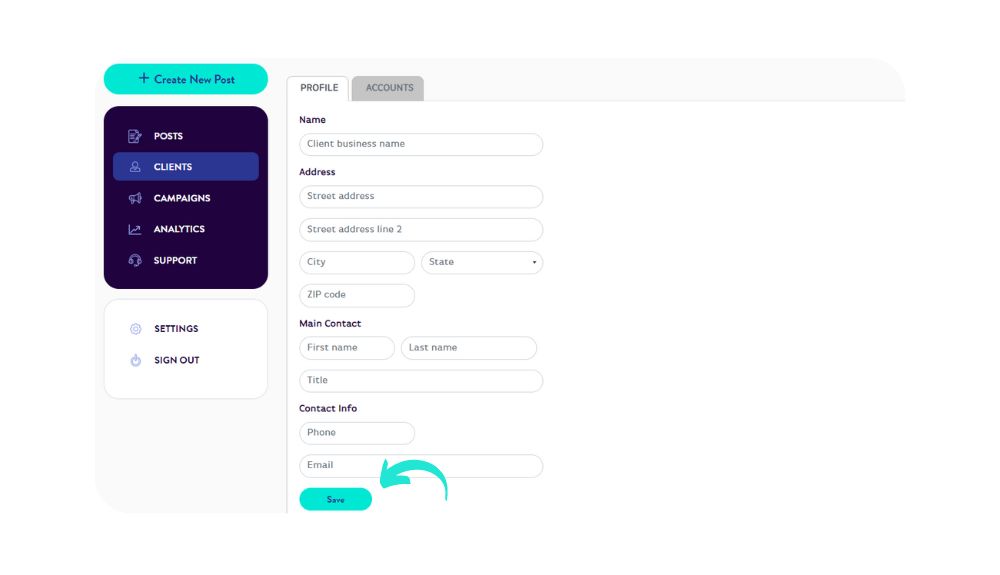
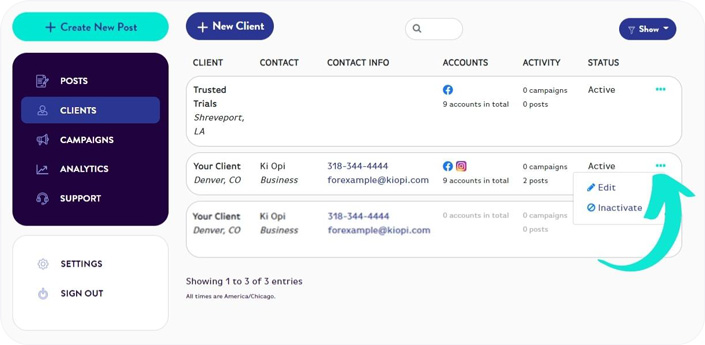
To add a client to your account, simply click CLIENTS on the lefthand side of your Kiopi dashboard. From there, you’ll be taken to another dashboard where your current (or future) clients will be located. Click the + NEW CLIENT button.
From there, you’ll be taken to a screen that will allow you to fill out all relevant client details, including their name, street address, and contact information. After completing, click the save button.
After saving, you’ll be able to connect your client’s social media accounts by clicking + NEW ACCOUNT.
How do I add a platform to a client account?
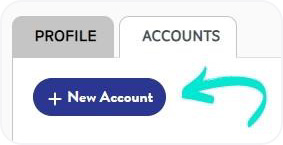
To connect a new social media account from Instagram, Facebook, Twitter, LinkedIn, or Google My Business, simply click on the CLIENTS button in the lefthand corner of your Kiopi dashboard. From there, locate the client you would like to add a social media platform to. To the very right of that client’s information, you’ll notice three turquoise dots – click those.
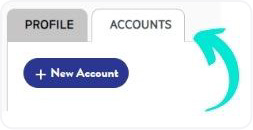
Then, select the Edit button. From there, you will be redirected to the client’s profile. In the top left corner next to the PROFILE tab, click the ACCOUNTS tab. Then click new account.
From there, you can select which platform you want to add to your client’s profile.
How do I add other users to my account?
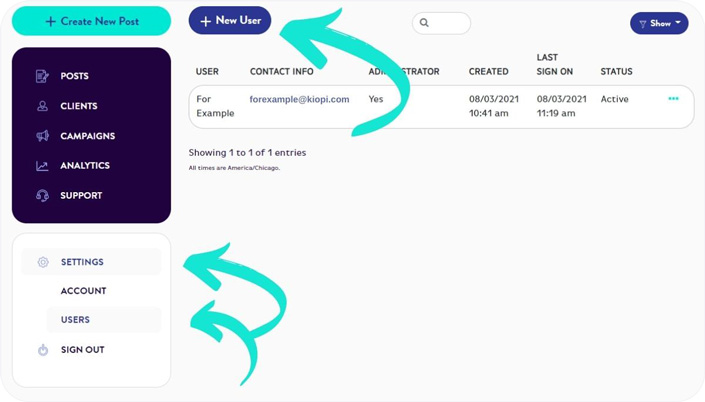
In order to add users to your account, simply click the SETTINGS tab on the lefthand sidebar of the Kiopi dashboard. A dropdown menu will appear with two options: ACCOUNT and USERS. Click the USERS tab. From there, you’ll find a list of current users as well as the option to add a new user. Click the + New User button, fill in the required information, then save your changes. The new user will automatically be added to your account.
RememberKiopi limits the number of users who have access to the account based on the subscription plan you’ve chosen. (Primary - 2 users; Pro - 4 users; Premium - 8 users; Platinum - 16 users.)
If you would like to add more users than your current plan allows, you can always upgrade your subscription with the click of a button!
How do I upgrade my subscription?
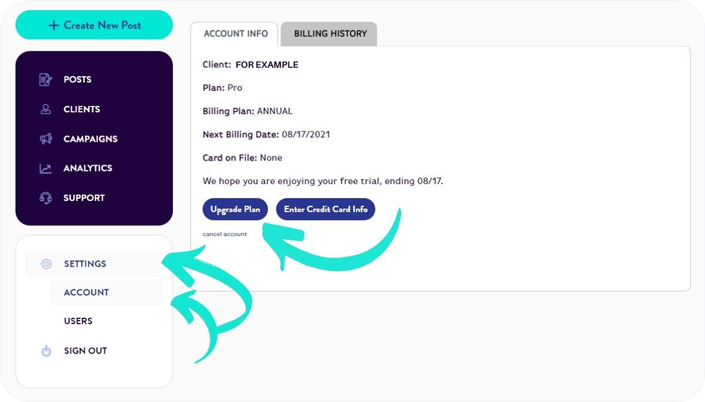
Looking to upgrade your subscription? Not a problem! To do this, locate the SETTINGS tab on the lefthand sidebar of the Kiopi dashboard. From there, a drop-down menu will appear with the options of ACCOUNT and USERS. Click the ACCOUNT tab.
Next, simply select the plan to which you would like to upgrade. We’ll prorate your payment for the current billing cycle.
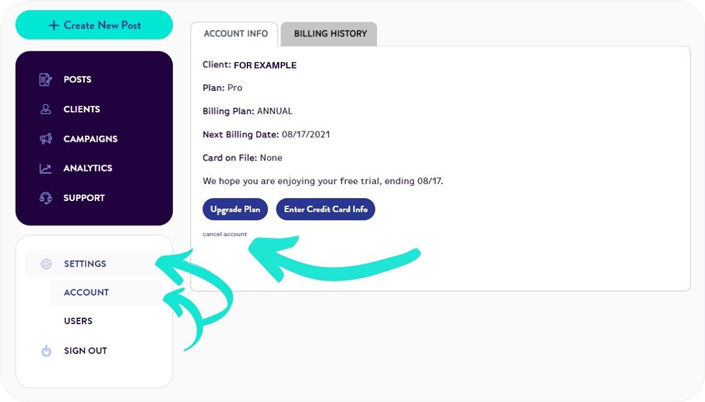
How do I cancel my account?
To cancel your subscription, simply click the SETTINGS tab and then the ACCOUNT tab below. This will take you to your Account Info, where you will find the cancel account button located beneath the Upgrade Plan and Enter Credit Card Info buttons.
RememberRemember, however, if you cancel your account, you will also cancel any prescheduled posts as well. We’re sorry to see you go!
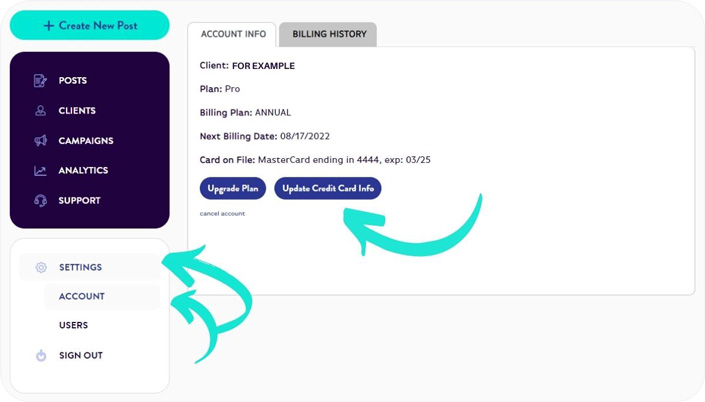
How do I update my credit card information?
To update your credit card information, simply click the SETTINGS tab and then the ACCOUNT tab that appears below. This will take you to your Account Info, where you can find the Update Credit Card Info button located to the right of the Upgrade Plan button.
Then, complete the required fields to update the credit card information you want us to keep on file. Your new card will not be charged at this time, but rather at the start of the next billing period.
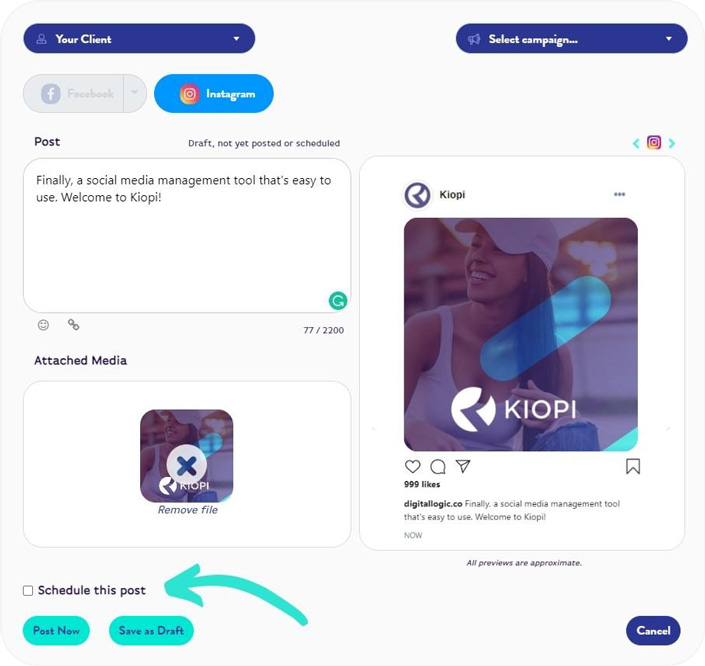
How do I schedule a post to go out on a future date?
Scheduling posts is as easy as it gets with Kiopi. After all, that’s what we’re all about! To schedule a post for a future date, you’ll first need to click the + Create New Post button at the top left corner of your Kiopi dashboard. From there, you’ll need to select your client, the platform(s) you would like to post to, and the appropriate campaign, if any. Once your caption and image fields are properly filled out, click the checkbox in the lower-lefthand corner that reads Schedule this post.
You may either type in the date and time manually or choose from a convenient drop-down calendar and clock.
Finally, click the Save and Schedule Post button and let Kiopi do the rest for you!
Why are some platforms not available when I create a post?
If you are having trouble locating a platform while creating a post (Instagram, Facebook, Twitter, LinkedIn, or Google My Business), it may be that you haven’t yet connected those accounts to the appropriate client. To connect a new social media account from any of the aforementioned platforms, simply click on the CLIENTS button in the lefthand corner of your Kiopi dashboard. From there, locate the client you would like to add a social media platform to. To the very right of that client’s information, you’ll notice turquoise ellipsis – click those.
Then, select the Edit button. From there, you will be redirected to the client’s profile. In the top left corner next to the PROFILE tab, click the ACCOUNTS tab. Then click new account.
From there, you can select which platform you want to add to your client’s profile.
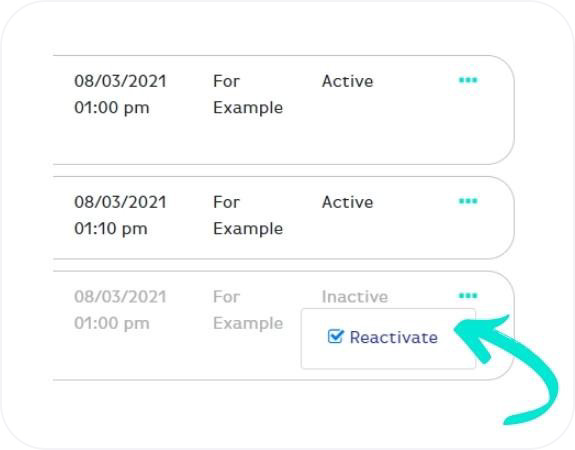
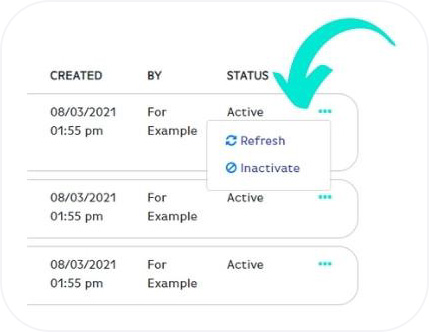
If, however, the platform has already been connected but it still shows that it is unavailable, check the status of the account. You’ll notice the account either says “Active” or “Inactive” under the STATUS bar. If the account is inactive, click the Reactivate checkbox. You should now have access to posting on this platform.
There are a few ways you might run into a problem with your post. One of the errors you may encounter may be described as “Rejected Media.” In this case, it is likely something to do with the dimensions of the media you are attempting to post. For example, your photo might not be the right size for Instagram (1080 x 1080px) or a video may simply be too long to upload. To repair this post, you would have to go in and edit the post, then upload your revised media with the proper dimensions.
If the problem wasn’t with the media, you may receive a notification that claims there is an authentication error with the social network. To fix this, click the CLIENTS tab on the lefthand sidebar, then locate the client whose post you are trying to fix. To the very right of that client’s information, you’ll notice turquoise ellipsis – click those.
Then, select the Edit button. From there, you will be redirected to the client’s profile. In the top left corner next to the PROFILE tab, click the ACCOUNTS tab.
You’ll see a list of all of the available platforms for each client. Find the appropriate account and click the Refresh button from the ellipsis control to the right. This should solve your problem.
Need help?
Shoot us an email and our support team will be in touch asap.