
Business growth and promotion doesn’t work the way it used to. If you want your brand or business to succeed in this day and age, then you need social media. Social media platforms like Facebook, Instagram, and Twitter can help you get the word out about your products, services, talents, and more. But getting started can be overwhelming and tough. No need to fear – Kiopi is here to help you create Facebook business page.
A Facebook business page is just like a personal Facebook page, except you’re promoting your business, not yourself. A Facebook business page allows you to connect with existing Facebook friends and potential customers. It can also be a creative way for you to promote your products and services through aesthetically pleasing photography, graphics, status updates, and even memes. In our increasingly technological world, the success of your business often depends on social media exposure.
The first step in creating a Facebook business page is setting up an account. In order to set up a new Facebook business page, though, you have to log into your personal Facebook account and go from there. No need to fear – random strangers won’t be able to see all your personal information and life updates on this new business page. You’re going to be an administrator on this new page, so you need to create it and connect it with your personal Facebook account. You can also connect other administrators to the new Facebook business page.

Click here to create Facebook business page: https://www.facebook.com/pages/create
Start by filling in the boxes on the left-hand side of the page: page name, categories, and description. As you type in this information, it will be displayed in the page preview to the right.
You need to make sure your page name is something that’s easily searchable, like your business name. If you add other descriptors and unnecessary words to the name, your business profile will be harder to find.
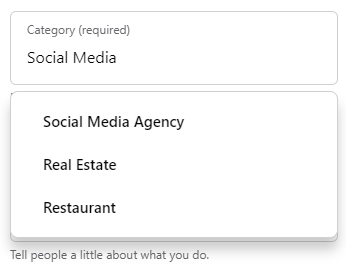
Next, type in the category of your business. The category should succinctly describe what your business is. Facebook will provide some category suggestions as you’re typing. You can pick up to three categories.
The next step, and possibly the most important step in the world of social media, is adding pictures. Adding aesthetically pleasing pictures that uniquely depict your brand is very important. You want your business – and your Facebook business page – to look and feel good to viewers. You want to make it look and feel like a good place to go and shop from.
First and foremost, you need to pick a profile picture. If you have a logo, you could just use your logo here. If you’re a singer, a comedian, or some other public figure, you could just upload a picture of yourself. Lastly, if you’re a local business, a picture of your brand or product would be ideal. No matter what you pick for your profile photo, you want to make sure it’s pleasing to the eye and that it also helps customers identify your brand right off the bat. Also, make sure your profile photo is 170 x 170 pixels, because this is the best size for Facebook pages.
Next, you need to add a Facebook cover image. This is going to be the biggest and most noticeable picture when people click on your Facebook business page, so you need to choose wisely here. The best size for a cover photo is 1640 x 856 pixels. Similarly to the profile picture, you want to make sure your cover image accurately describes your brand. Once you’ve done that, click add cover photo.
Before you save and continue, make sure to click the desktop and mobile views to make sure you like the look of your page. The pictures and layout on your Facebook business page will look a little different on a desktop vs. on a mobile phone. For example, your cover photo may be cropped differently on a mobile phone, so crucial details of the photo may not be visible. So be sure your pictures look good on both desktop and mobile. When they do, click save.
The next step in creating a Facebook business page is connecting with WhatsApp, but only if you want to. Not everyone uses WhatsApp for messaging purposes, but if you know that a lot of friends and customers in your area do, then it’s not a bad idea to connect with the app.
If you do choose to connect with WhatsApp, you will have a permanent WhatsApp button on your Facebook business page. Also, connecting with WhatsApp allows people to message you on that app directly from Facebook ads.
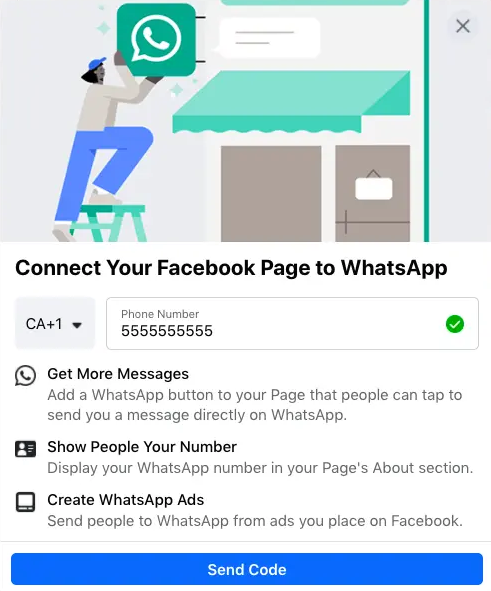
If you want to connect with WhatsApp, type in your phone number (or your business phone number) and click “send code.” If you don’t want to connect with this app, just click the X in the upper right-hand corner.
Next, you need to create a username for your Facebook business page. This username will help people find your page. The character limit for a username is 50 characters, but you should keep your username as short and sweet as possible. For example, you could just put your business name or even your business name + your city.
Facebook will tell you if your username is already taken. If it is, try different variations of your business name, but still make it short and easy to remember. If you see a green check mark next to your username, you know it’s available and you can use it. Lastly, click “create username.”
At this point, your Facebook business page probably looks really bare aside from the pictures. Now it’s time to add all your business details to really fill everything out.
Scroll down to the section on your page view called “set your page up for success.” Then you’ll want to click on the section called “provide info and preferences.”
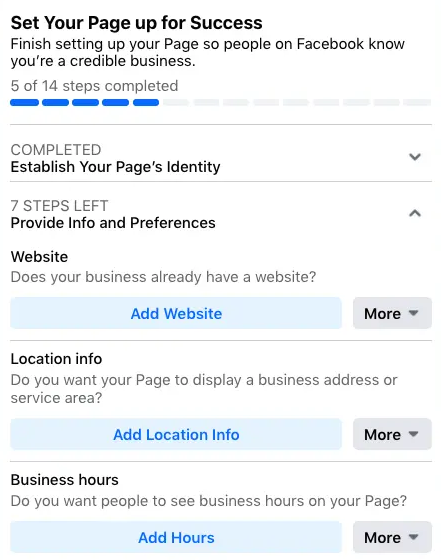
Make sure to fill out all this page info: your website, your business hours, and your location info. Your Facebook business page needs to be a one-stop shop for potential customers.
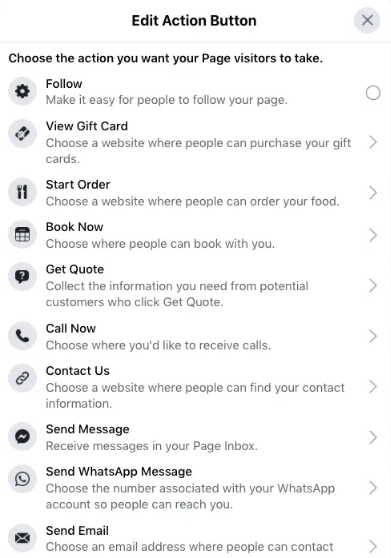
You also need to fill out the section called “add an action button.” Facebook business pages are great because they have built-in call-to-action (CTA) buttons so that customers can engage with your business immediately. So you need to pick the best call-to-action button for your business and brand. Maybe it’s an invitation to buy a product, make an appointment, download an app, or shop on a website. There are countless different CTA buttons to choose from.
If you’re not sure what kind of CTA button you want right now, you can always add it later. All you have to do is go to the left-hand menu – called Manage Page Menu – and scroll down to Edit Page Info.
If you do choose to go back and edit parts of your Facebook business page later, and you don’t want people to see your page while you’re editing it, you can change page visibility. In order to do this, follow these steps:
When you’re done editing your page, all you have to do is follow the same steps and click Page Published.
Now it’s time to create your first post on your Facebook business page. You can create any type of post that’s relevant to your business and brand: a status, a picture, or even an event. You want to have a few posts on your page before you start inviting personal Facebook friends and potential customers to your page. That way, they are drawn in and more likely to follow your business ventures.
Now you need to connect with your current Facebook friends and other people in your community.
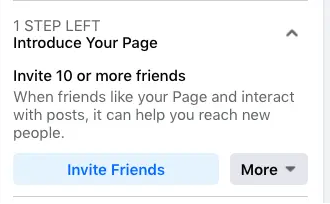
In order to get the word out about your business page, scroll to the bottom of the box called “Set your page up for success.” Then click the Introduce Your Page section. Now all you have to do is click the Invite Friends button, click which friends you want to invite, and send the invitations.
Ask your friends to like, share, and follow your new Facebook business page. Asking friends to leave reviews of your business and/or products can help you grow too. You can even go on your other social media accounts – like Twitter and Instagram – and promote your new page.
Yes, Facebook business pages are free! Creating a business is expensive in more ways than one, but promoting a business doesn’t have to be with Facebook business pages.
Firstly, Facebook Business Manager is a tool that can help your business’s online presence. Your coworkers can’t see your personal profile unless you are friends with them. If you don’t accept their friend requests, they can only see a limited amount of information such as your name, work email, and the Facebook pages you’re accessing.
Accessing Facebook Business Manager is simple. Follow these steps:
No. In order to create a Facebook business page, you must use your personal account. This is only because the business page needs one or more administrators. Connecting your personal profile to your business profile can feel risky – just because you don’t want strangers seeing your private information and details of your life – but this will not happen. Your personal information will not be visible anywhere on your business page.

Facebook lead ads make lead generation easy for your business. Lead ads help you find potential customers via Facebook and collect their basic information such as their name, email, and phone number. So instead of sending potential customers to a landing page that requires them to fill out a form and submit it, they will click on the lead ad instead. From the lead ad, the customer will see a form that already has their basic information in it. Then all they have to do is click submit.
According to Facebook’s Meta Business Help Center, lead ads can help businesses to:
If you ever decide that your Facebook business page is not helping the overall growth of your business, and you would like to delete it, you certainly can.
Keep in mind that once you go through the process of deleting your page, Facebook won’t officially delete it for at least 14 days. But during that two-week window, Facebook will definitely unpublish and/or deactivate the page so that people can’t see it anymore. If you would rather unpublish your business page for the time being – instead of deleting it entirely – then you can do that as well.
The first step in deleting a Facebook page is ensuring that you are an admin. If you are, then follow these steps:

If you’re looking to create a Facebook business page – or any type of social media business page – you need Kiopi. Kiopi is one of the best social media tools for businesses. Why? We offer social planning, social scheduling, content calendar creation, social media analytics and page insights, campaign management, link shortening, and so much more. That way, you can focus on running your business while we focus on promoting it. If you’re not fully convinced that we can help your business grow on social media, try out a 14-day free trial today.
© 2021 Kiopi | Terms of Use | Privacy Policy